How to clean your wool doll: part 2
Share
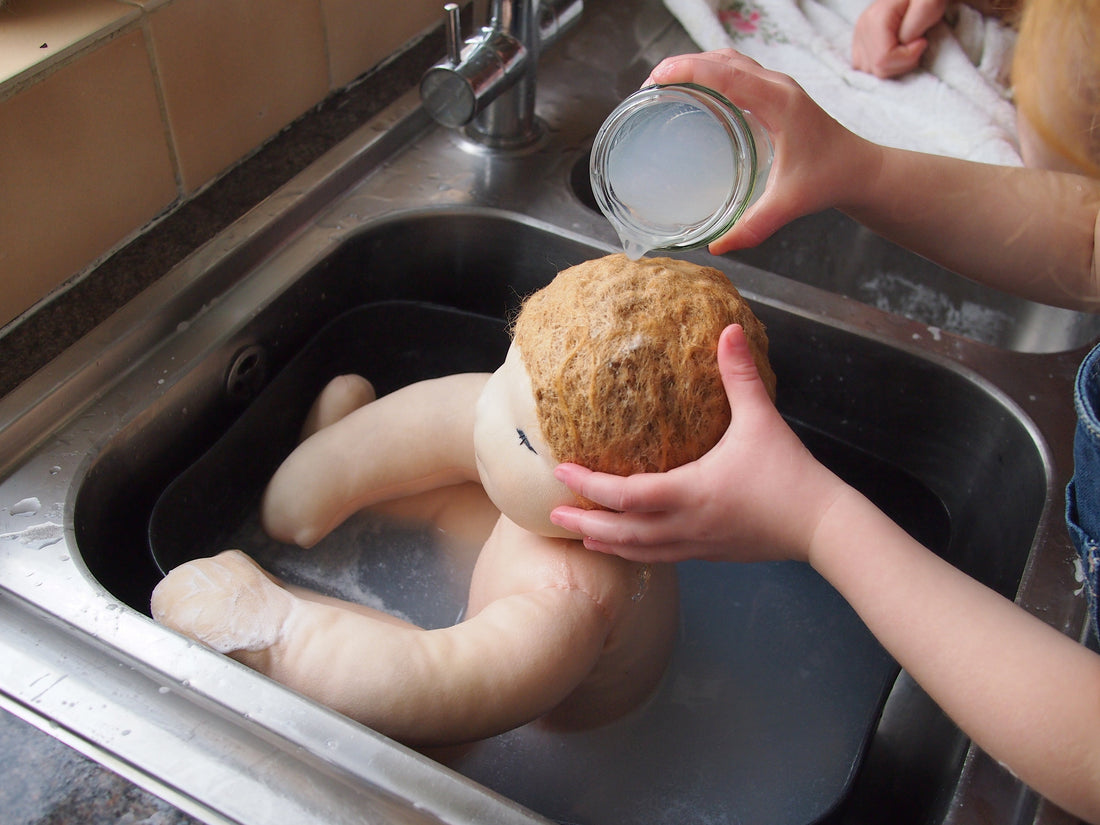
In part one my youngest daughter’s dolly ‘Annabelle’ had a surface wash and I shared how we do it. Today we are bathing Dolly and Rosie with a full submersion wash.
Please don’t panic – this is not difficult! My daughters did all this with my supervision, but it is very important that you follow the instructions to avoid felting your dolly (making her insides go all lumpy bumpy).

Wool dollies don’t need washing often, and most of the time, a surface wash is all that is needed to lift the play grubbiness and give a new lease of life
Before undertaking bathing your wool dolly please check you really do need to do it as they do take a while to dry and you need to prepare your child for this (see points 7 and 9 below). Please see my earlier blog post to find out how to surface clean your dolly as this is more than enough most of the time.
WHAT YOU WILL NEED
Soap flakes, or pure natural soap grated
Hot and cold water
A basin
Cotton cloth
Lots of towels
Optional: Stockmar crayon and a small piece of jersey rag
HOW TO BATHE YOUR DOLLIES
A well loved doll will need a full bath eventually – it will inevitably become a necessity through the illnesses and accidents childhood brings.
1. Remove all the dolly’s clothes (if they have any on).
2. Make up a mild soap solution by adding the soap flakes to a little bit of hot water and letting them dissolve. Then add this to the basin and add cold water until cool to the touch. Hot water increases the chance of the wool felting into lumps so we need to keep the water cool.
3. Carefully place your dolly in the basin. As this point it is crucial that you don’t rub or squeeze her as this will cause her wool stuffing to start to felt and form into lumps. Gently wash her just as you would a real baby, use a soft cotton flannel such as Cheeky Wipe to wipe her face and body.


4. Lift her out of the basin and fill it up with cold water, place her back in for her first rinse, keep repeating this until the water is clear and all the soap solution rinsed out. I can’t emphasise enough how important it is to not squeeze or rub her as the wool will felt very readily. For a smaller doll you could just rinse gently under a cold running tap – my daughter pretended Dolly was having a shower.

5. Wrap her up cosy in a towel and pat dry – don’t squeeze or wring as it could cause the doll to felt (I know I keep going on). Keep replacing the towel as it becomes wet – you may get through a few! Gently reshape her.

6. Place dolly on the flat to dry, away from direct heat. We laid our dollies on top of the drying rack in the garden, allowing the sunlight to use her natural cleaning power, bringing them in at night. The largest dolly took around 36 hours to dry.
7. While dolly is drying encourage your child to do something special for their beloved friend. My daughters planned a welcome home tea party with a homemade banner, cards and gifts. Or you could use this opportunity to make her new clothes, knit her a scarf or write a story about her!

8. Once dolly is dry (which could be a while) you can reapply the blush. Rub the crayon onto the soft jersey rag and then use this to gently build back up her rosy cheeks. This is also a great opportunity to check her over and repair any loose stitches (get in touch if you need any help).

9. Time to enjoy your clean dolly – here is a shot of the tea party my girls organised for Annabelle, Rosie and Dolly!

I hope I have managed to capture some of the excitement my girls got from caring and washing their dolls. It was a great opportunity as a mother to bond with my children through showing them how to care, that doing good things takes time, and to pass on my love of doll play.
